
 |
| Me and Brandy at Convention last year. |
Since becoming a Stampin' Up! demonstrator, I have learned so much about myself and continue to set and accept new challenges. I personally believe that we should never stop learning and this learning keeps us young and promotes a strong sound mind.
With this project, I am highlighting one of my most favourite techniques and one of the first techniques I ever learned. I love the elegant, regal look that is achieved and it is so easy to add a stamped image of any design and wow, a great card! I chose to work with the Wisteria Wonder ink and cardstock, firstly because I like the colour purple and secondly, I absolutely love the finished royal timeless look of this combination . My first project with this technique was before I joined Stampin' Up! so will have to admit I have no fun name to call the colour, and calling it just brown, seems wrong. So let's add some excitement and call it waffle cone brown! Here I pause to giggle, because if you give this technique a try and start with a piece of "waffle cone brown" you will indeed have a piece of paper in your hand that looks like a waffle cone when complete! Yummy! So yes, grab a piece of Crumb Cake cardstock and ink (yes one of the current wonderful Stampin' Up! colours), and try this technique and viola, you have yourself the start of a great ice cream cone card! And who doesn't love ice cream! My fav....Original Moose Tracks Ice Cream...and no, no moose was involved in the making of it, and yes, I too wonder if it's because it sounds so Canadian, eh?
Funny story, about the very Canadian usage of the word "eh?" and my Stampin' Up! travels. It seems that while in the US, my new Stampin' Up! friends in the US where waiting and listening very attentively to be the first to hear me say "eh?" and also some went as far as to some friendly bets with spouses and friends, as to when and how often I would use it! I have since learned that I do say this very common expression of Canadians but not as often as some. So many had to wait a day or two even to hear me use it, and when I did, I was privy to the stories!! I have since read the Wikipedia definition of Eh, because we all know that Wikipedia knows everything, and if you want a chuckle, it is worth the read! And to all those, except those maybe from Michigan and Wisconsin that share in the use of the expression, it's the same as your "huh?" or "right?", eh?
Okay, so I might have gone on a tangent! For those that know me, I might do that occasionally, but without further ado, let's watch my first video, eh!

Base:
1. Cut a 5 1/2" x 8 1/2" piece of Basic Gray and fold in half to be your base.
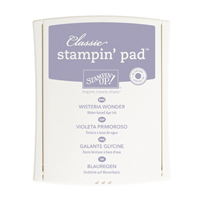
2. Cut a 5 1/4" x 4" piece of Wisteria Wonder.
3. Score this piece of Wisteria Wonder every 1" the length and width using the Diagonal Score Plate.
4. Distress the outside edge of the card using Wisteria Wonder ink on a sponge dauber.
5. Fold on the score line and distress using Wisteria Wonder ink on a sponge dauber. Flip and distress other side of the scored line. Continue this process for all the score lines both length and width of the card until all score lines are distressed from both sides.
6. Adhere to base.
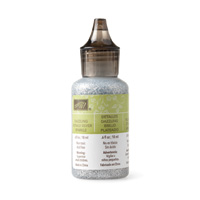
7. Add Silver Dazzling Diamonds to every intersection of score lines on the Wisteria Wonder card base.
Flower topper:
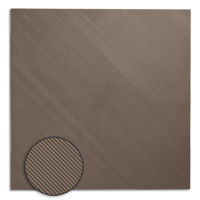
1. Cut a 2 1/4" x 3 1/4" piece of Silver Foil sheet.
2. Cut a 2" x 3" piece of Whisper White.
3. Stamp Bloom with Hope stamp with Wisteria Wonder ink onto the Whisper White piece.
4. Adhere stamped piece onto the Silver Foil with your Snail adhesive.
5. Adhere Silver Foil piece to card base by placing dimensionals in each corner.
6. Add Sivler Dazzling Diamonds to flower centres.
Supplies for this card:


Inkspirations with Sheri - Shopping
P.S. I love the feeling that I have from making this video and being able to share and hopefully inspire you...so I will be making more videos...so stay tuned!
Awesome video Sheri
ReplyDeleteThank you! Couldn't have done it without your help :)
DeleteGreat video and I love the technique
ReplyDeleteJean, Thank you so much! I hope that you give it a try!
DeleteBeautiful card!
ReplyDeleteThank you!
DeleteBeautiful card!
ReplyDeletelove your card, love to learn new techniques.
ReplyDeleteSo pleased to hear! I hope you give it a try :)
DeleteVery nicely done! Thank you for sharing:)
ReplyDeleteThank you!
DeleteVery nicely done! Thank you for sharing:)
ReplyDeleteBeautiful card...thanks for sharing
ReplyDeleteThank you! Watch for more!
DeleteOMG! Great first video............pretty card.
ReplyDeleteThank you! I am super excited and can't wait to do more :)
DeleteWell done for your first video, very professional! Lovely unusual card.
ReplyDeleteThis comment has been removed by the author.
DeleteGreat feedback! Thank you! I was very excited to share this card :)
DeleteBeautiful card and great first video. My first videos were soooo long. TFS
ReplyDeleteThank you so much! I was too nervous for the video to be any longer, lol! Might be longer next time though :)
DeleteGreat video! I didn't know how to do this, very pretty. Now I need to buy the diagonal scoreboard, yea, new supplies!
ReplyDeleteThank you! I love when I learn a new technique! I love how this card looks way harder than it is! Yahoo for wishlists and shopping! I enjoy those too!
DeleteLove the card, very beautiful!
ReplyDeleteThank you so much!
DeleteHi, Very good card. Now I have a reason to use my diagonal scoring plate. Also, very nice to post the cutting directions; made it so much easier. Now I don't have to second guess & will save me time. Very good job! Please post more ways to use the diagonal plate, sure could use some. Thank you, Bev :-)
ReplyDeleteHi Bevie, you are most welcome. I am so tickled that I was about to show you one of the many ways to have fun with the diagonal scoring plate! Thank you for the feedback too - greatly appreciated! I will try to post more fun ways to work with it!
DeleteThis was a great tutorial and I have never seen this technique before. I will be trying this out when I get home. (On vacation )
ReplyDeleteYour voice and explanations were easy to understand and I want to encourage you to do more. Looking forward to the next one.
Debbie, thank you for the great feedback! So excited that you enjoyed my video while on holidays and will give it a try. Let me know how it goes! I can not wait to do my next video!
DeleteGreat technique, thank you for sharing. Well done on the video. :)
ReplyDeleteThank you! Thank you! :)
DeleteHi Sheri,
ReplyDeleteI'm a member of Brandy Cox' blog and found you through her. I read this is your first video. Well, I truly enjoyed it. You did a great job with the card and with the video. I'm joining your site as well and I hope you publish many more videos. Thank you for sharing tis great technique.
Pat
Hi Pat, Brandy is the sweetest! I am so happy that you enjoy her blog, as I do, and hopped over to mine to watch my first video! Thank you for joining my site and I believe me, I will be sharing my next video soon!
DeleteBrava! Awesome job on your first video! Love your card and the technique! Looking forward to seeing more
ReplyDeleteSharie, thank you! Wonder feedback - thank you so much!
DeleteBeautiful card and wonderful job on the video
ReplyDeleteThank you! Thank you!
DeleteFabulous first video Sheri, you did a terrific job, very clear instructions, so helpful. You are obviously a natural! Looking froward to more video's Thanks for sharing Janet.
ReplyDeleteJanet, thank you! I must have hidden my nerves well, as I was not feeling like a natural....but I do know, I am so excited to do my next one! Thank you, great feedback and I appreciate it!
DeleteExcellent Sheri! I've Got to make this card! Great video and very clear instructions.
ReplyDeleteLove it! "I've got to make this card"! I know you will enjoy it, and you must tell me how it goes! Thank you!
DeleteSuch a pretty card Sheri with great instructions. Thanks for sharing
ReplyDeleteSandy, thank you so much!
DeleteLove your card. Thank you for sharing and you did an awesome job.
ReplyDeleteThank you! Beautiful compliments - thank you!
DeleteThis comment has been removed by the author.
DeleteWow! I would never have guessed this was your first video. I found you through Brandy Cox, and so glad that I did. I haven't tried a technique like this one, but will soon, now that I've seen it. Good luck with your future videos! Thank you for sharing the ideas.
ReplyDeleteThank you BethAnn! So flattered that you could not tell that this was my first video! I am tickled too that you have not seen this technique and something new to try. Thank you and happy crafting!
DeleteFound you from Brandy's web site.. Congratulations. Your video was great.. Lovely card and demo makes it very clear on how to reproduce it.
ReplyDeleteI love viewing card making videos. I am in Western Australia, so a long way away..
Hello Mathea in Western Australia! I love how technology can bring you and I together! Thank you for enjoying Brandy's videos and following to see mine! I am so excited that you liked me card and that it was clear instructions! I am looking forward to making more!
DeleteCongratulations on your video completion Sheri. You did a great job. I've never seen that technique before, it's fabulous! I'll be sure to check back often for new inspiration from you. TFS your creativity!
ReplyDeleteThank you Allison! Great to hear that you found a fabulous new technique and you found inspiration! I can not wait to do my next video and inspire you and others! I hope you enjoy my future projects too!
DeleteAlso found you via Brandy... GREAT video, and a tequniques I had never seen before! Do another video! I will be sure to watch!
ReplyDeleteYay! Thank you Katie! I can not thank Brandy enough for helping me get to you and all the others from her blog! Such an gift! Watch as another video will be released soon!
DeleteGreat card, and a great video explaining the technique, which is new to me. I'll be sharing it in my classes. I also came via Brandy's blog, but will be adding yours to my feed. Thanks for sharing!
ReplyDeleteNancy, that is wonderful! I love this technique and I hope that your classes do too! Let me know how it goes! Thank you for joining my feed too!
DeleteCongratulations and thanks for a very clean, clear and informative video. Would never have known it was your first if you had not said so.
ReplyDeleteGreat technique and thanks for the little tips on how to sponge each side etc and to make sure of doing the edges first.
Look forward to you making more as am sure there will be many of us wanting to see more of your lovely work.
Thank you Veecee! I was trying to capture all the tips and pointers that I would give in a class in the video, so that is wonderful feedback! I am very excited to share more ideas and designs! Thank you!
DeleteThe video was wonderful and you explained everything so well but kept things moving. The card is just lovely and I will be able to easily 'borrow' it! Thanks so much for sharing and I hope to see more videos soon.
ReplyDeleteThank you! So glad that you enjoyed it! Love that you are going to "borrow" it! :) More videos coming soon!
DeleteI am part of Brandy's team & found you through her. I love your card & you did an awesome job with your first video. I hope to do one myself one day & you have inspired me! Thanks!
ReplyDeleteYou are on a great team! Thank you so much! I encourage you to do your first one! It seems harder than it is :) Thank you!
DeleteBeautiful card, love the technique. I am too a demonstrator. I would love to do a video sometime but don't know where to start, you make it look easy. Thanks
ReplyDeleteThank you! Do a video! It is worth it! Pick a project and go for it! That's what I did :)
DeleteSheri, way to go! Since I met Brandy, she has been my cheerleader as well for me to dive into the world of video! This year, 2015, was finally the time to take the plunge to start and Brandy has been so generous of her talents for me to get going! I will be your cheerleader as well as you post more and more videos and inspiration. I love being a part of the Stampin' Up! family. It was so nice meeting you at Leadership 2015 in Orlando. Kari Downing Reese
ReplyDeleteKari! Thank you!! Brandy is so incredible, generous and talented, and such an encouraging cheerleader! I will go find your videos and share in the cheering! Thank you for your support! So wonderful to meet you at the Leadership....will you be at Convention? Hope to see you there! Hooray!
DeleteWonderful, wonderful, wonderful job, Sheri! Absolutely LOVED the technique and can't wait to try it out! It is just beautiful! I appreciate the written card recipe too....makes it so much easier to try out after watching the video! I usually forget certain little hints when I try to make my own! LOL Thanks for sharing your inspiration and am looking forward to more!! Sending hugs fromfd Rochester, NY!
ReplyDeleteThank you, thank you, thank you! I can't wait to hear about your card when you try the technique! I love it and can't wait to post more designs along with more videos to share and inspire others! Hugs from BC, Canada!
DeleteHello, I didn't know about this technique. Thank you for sharing it. Lovely card!
ReplyDeleteHi Cindy! Thank you so much! It's it fun when you find a technique you haven't seen :)
DeleteLoved the video and card. Awesome job. Can you talk louder please, as I am hard of hearing. Would love to hear ALL that you say and not just part of what you say. I want to apologize if i have offended you. I know this is your first video and you did a great job.
ReplyDeleteI signed up to follow you blog. Looking forward to more cards and projects.
Pined the card, I just love it.
DeleteHi Cynthia, thank you for the feedback and for signing up to follow my blog. I think that the sound quality will improve in the near future, so hopefully you will be able to hear it better next time. Thank you again for support.
DeleteWonderful job on your first video. Love to find videos with card ideas and techniques.Thank you again.
ReplyDeleteThank you so much Jeri!
DeleteNice job Sheri, I got to your page by way of Brandi Cox. I love this technique it would make a wonderful Mother's Day card. Just remember to talk like your teaching your best friend how to make the card and it will go great every time you make a video. Good luck. I can't wait for the next video creation. Waiting in Illinois....
ReplyDeleteThank you Bridget! Wonderful advice that I will definitely try in my next video, that is in the works! See you online soon! Thank you!
DeleteWhat a beautiful card--and thank you for the easy to follow directions! I enjoyed your first video, and am looking forward to seeing more of them from you! Found your blog from your friend Brandy Cox!
ReplyDeleteThank you so much! I have been nervous to do another, but working up the nerve to, so watch for it soon!
DeleteKeep up the good work, the card is beautiful. Thank you for the instructions.
ReplyDeleteThank you! Love this design and I will post a picture of my Christmas versin!
DeleteWow! Love this technique. Your video was great. I can't wait to try this.
ReplyDeleteCarol Steinbrecher
Hi Carol! I love this technique too! Let me know how it goes! I made one in cherry cobbler with gold dazzling detials and love it too!
Delete