Thursday, April 30, 2015

Pillow Top Technique

This is it!  I did it!  I made a promise to my good friend and fellow cross border demonstrator, Brandy Cox, whilst attending Leadership in Florida that I would accept her challenge to make a video of myself stamping and share it!  After life keeping my days full, and while learning more about cameras, making a video and also stepping out of my shell, I have fulfilled my promise and below I will be sharing my video with you.  I am excited and nervous as this is a new adventure for me!

Me and Brandy at Convention last year.

Since becoming a Stampin' Up! demonstrator, I have learned so much about myself and continue to set and accept new challenges.  I personally believe that we should never stop learning and this learning keeps us young and promotes a strong sound mind.

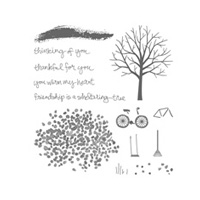
With this project, I am highlighting one of my most favourite techniques and one of the first techniques I ever learned.  I love the elegant, regal look that is achieved and it is so easy to add a stamped image of any design and wow, a great card!  I chose to work with the Wisteria Wonder ink and cardstock, firstly because I like the colour purple and secondly, I absolutely love the finished royal timeless look of this combination .  My first project with this technique was before I joined Stampin' Up! so will have to admit I have no fun name to call the colour, and calling it just brown, seems wrong.  So let's add some excitement and call it waffle cone brown!  Here I pause to giggle, because if you give this technique a try and start with a piece of  "waffle cone brown" you will indeed have a piece of paper in your hand that looks like a waffle cone when complete!  Yummy!  So yes, grab a piece of Crumb Cake cardstock and ink (yes one of the current wonderful Stampin' Up! colours), and try this technique and viola, you have yourself the start of a great ice cream cone card!   And who doesn't love ice cream!  My fav....Original Moose Tracks Ice Cream...and no, no moose was involved in the making of it, and yes, I too wonder if it's because it sounds so Canadian, eh?

Funny story, about the very Canadian usage of the word "eh?" and my Stampin' Up! travels.  It seems that while in the US, my new Stampin' Up! friends in the US where waiting and listening very attentively to be the first to hear me say "eh?" and also some went as far as to some friendly bets with spouses and friends, as to when and how often I would use it!  I have since learned that I do say this very common expression of Canadians but not as often as some.  So many had to wait a day or two even to hear me use it, and when I did, I was privy to the stories!!   I have since read the Wikipedia definition of Eh, because we all know that Wikipedia knows everything, and if you want a chuckle, it is worth the read!  And to all those, except those maybe from Michigan and Wisconsin that share in the use of the expression, it's the same as your "huh?" or "right?", eh?  

Okay, so I might have gone on a tangent! For those that know me, I might do that occasionally, but without further ado, let's watch my first video, eh!


Base:
1. Cut a 5 1/2" x 8 1/2" piece of Basic Gray and fold in half to be your base.
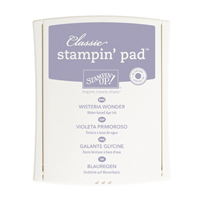
2. Cut a 5 1/4" x 4" piece of Wisteria Wonder.
3. Score this piece of Wisteria Wonder every 1" the length and width using the Diagonal Score Plate.
4. Distress the outside edge of the card using Wisteria Wonder ink on a sponge dauber.
5. Fold on the score line and distress using Wisteria Wonder ink on a sponge dauber.  Flip and distress other side of the scored line.  Continue this process for all the score lines both length and width of the card until all score lines are distressed from both sides.
6. Adhere to base.
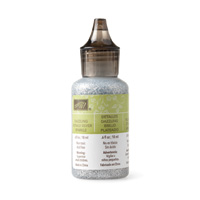
7. Add Silver Dazzling Diamonds to every intersection of score lines on the Wisteria Wonder card base.

Flower topper:
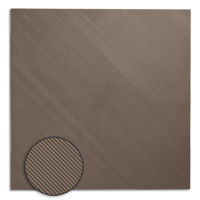
1. Cut a 2 1/4" x 3 1/4" piece of Silver Foil sheet.
2. Cut a 2" x 3" piece of Whisper White.
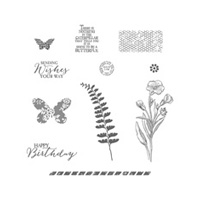
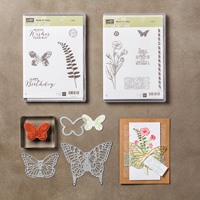
3. Stamp Bloom with Hope stamp with Wisteria Wonder ink onto the Whisper White piece.
4. Adhere stamped piece onto the Silver Foil with your Snail adhesive.
5. Adhere Silver Foil piece to card base by placing dimensionals in each corner.
6. Add Sivler Dazzling Diamonds to flower centres.


Supplies for this card:


Inkspirations with Sheri - Shopping

P.S. I love the feeling that I have from making this video and being able to share and hopefully inspire you...so I will be making more videos...so stay tuned!


Tuesday, April 28, 2015

Request a Stampin' Up Catalogue

Weekly Deals

Weekly deals are here!

I am feeling the love with the Sweetheart, Hearts Border and Confetti Hearts border punches all on sale!  Oh my, I love that the hearts are so versatile!  I love making and receiving a card with love, and how much easier can it get than just punching out hearts, and viola, mon cheri, a card with love!

Tuesday, April 21, 2015

Clearance Rack


So if you didn't find a sale or two that you liked on the Retiring List, you might find something on the Clearance Rack!  A few new goodies were just added!  

Remember all items on the Clearance Rack are while supplies last!

All Retiring Products - Act Quickly

Here they are... the retiring list - Act quickly!

Monday, April 20, 2015

Retiring List


It's here!  We're saying goodbye to retiring products from the 2014-2015 annual catalogue, but before we do, we're giving everyone an opportunity to order their favourites with discounts up to 50 percent off retail. Retiring products will only be available until June 2, or while supplies last, so get them before they're gone! We've also including the My Digital Studio list, with all products discounted 30 percent off retail.

*Note: Due to high demand for retiring stamps, we'll keep producing retiring stamps until May 26 (not accessories-accessories are only while supplies last).


Retiring List 2015 Video

Spoiler alert!  Here is a video showing the 2015 Retiring products!!!


The RETIRING LIST!!!    Tonight at 11pm Stampin' Up! announces what is going to retire from the catalogue!  

Friday, April 17, 2015

Four seasons of Sheltering Tree

Are you as in love with this set as I am?  I have never done a class before where I have designed only using one stamp set, until I met this set!  The other evening, the studio was experiencing all four seasons at once as a wonderful group of ladies and I created the cards below!  I love how versatile this set is!   So many colours can be used, so many pictures can be created and oh my, don't forget the embellishments that could be used.  A one set wonder this set is!  I think it might be the staple of the season (ha ha, no pun intended there!)


 This first card is depicting Spring.  It uses Pink Pirouette, Blushing Bride and Strawberry slush inks to capture this cherry blossom tree in bloom!


Summer is the theme on this card, with using only Pear Pizzazz and stamping off the colour.  Tip: when stamping the bicycle, stamp the wheels first and then line up the frame to your wheels!  I see more creating coming as during class the frame was also called a kite and a tent....so I see more creative designs in the future!


With Fall, I loved playing with more colours, so included in this beauty are Crushed Curry, Tangerine Tango and Cajun Craze inks!  Love it!  And yes I might have been caught calling the rake a broom about 3 times in class...you can tell what I use more often (and no I don't ride on it, but you never know some might think I could as I am magical with creating at times!).


And my favourite....Winter!  Here Soft sky and Pool party inks are used to add snow to my tree along with snow in the air.  I added a few pearl embellishments but can't wait to try our retired snowflakes and sequin collection, Dazzling Diamonds and some heat embossing!

Other tips:
- remember when working with the Photopolymer set is use your Stampin' Piercing Mat if you solid images are stamping solid - this helps get even pressure and ink coverage!  
- start by stamping the trunk of the tree and then add your foliage, and I started with the lightest colour first
- the blades of grass, can be stems for the stamp I used as random fall leaves, but it could be flowers!

I have listed all the supplies used if you would like to make these cards too:


Butterflies have landed!


Update from Stampin' Up!:

After a (very) long migration, the Butterflies Thinlits Dies have landed in our warehouse and are now available for purchase!

Remember, you can take advantage of two special offers through April 30:

Get the Butterflies Thinlits at a 15 percent discount--just $26.30!

Buy any of the Butterflies Thinlits Bundles at a 15 percent discount and choose one of three FREE Sale-A-Bration items (only available while supplies last)!

Best Year Ever Designer Series Paper (item 138633)
Best Year Ever Accessory Pack (item 138634)
Irresistibly Yours Specialty Designer Series Paper (item 138635)

Let me know if you would like to order these! Or order online today (and don't forget to use your Hostess Code, if you don't have one, please use WF7WDJBH).